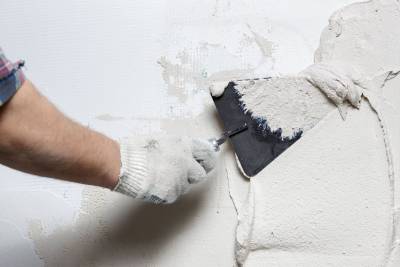
Did you know you can dramatically change the look and feel of any room simply by modifying the texture of the ceiling? This is an often overlooked part of the room that, when done properly, can add instant elegance or rustic charm to your living spaces. In this step-by-step guide, we will be answering the questions when, why, and most importantly, how to texture a ceiling.
When to Consider Ceiling Texturing
One of the most critical factors in texturing a ceiling is timing. If you are in the middle of home renovation or building a new house, this could be the ideal time to consider either adding or changing the texture of your ceilings. This strategy can add value to your home while differentiating your style from the typical flat-white ceilings found in most houses today.
Why Add Texture to Your Ceiling
Aside from its aesthetic appeal, there are a few other reasons why homeowners choose to texture their ceilings. Some of these reasons include:
- Noise Reduction: Certain types of ceiling textures can reduce noise levels in large or echo-prone rooms.
- Cover Imperfections: If your ceiling has cracks, texture can be an effective way to hide these imperfections without expensive repairs.
Choosing a Ceiling Texture Style
Before we dive into how to texture a ceiling, it's essential to understand the various styles you can choose from. Here are a few common ceiling texture types:
- Popcorn Ceiling: Recognizable for its bumpy appearance, this was a popular choice in the 90s due to its inexpensiveness and ability to absorb sound.
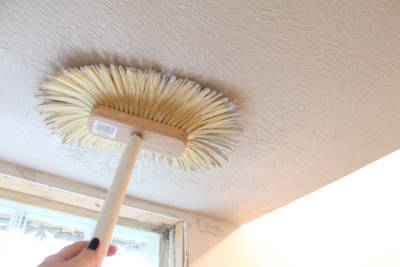
- Stomp Ceiling: This textured ceiling involves brushing a stippling brush against the ceiling in different directions to create a stomp design.
- Knockdown Texture: One of the more modern methods, this style involves spraying a mixture onto the ceiling and then smoothing it out with a knife.
Materials Needed for Ceiling Texturing
Now that we've covered the basics, let's get into the details about how to texture a ceiling. To get started, you will need the following materials:
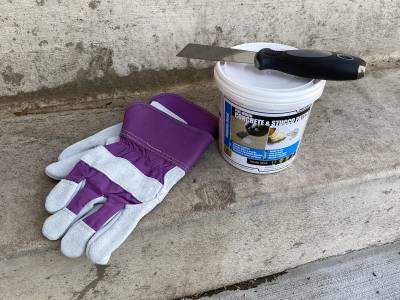
- Protective eyewear and clothing
- Painters tape and drop cloths
- Joint compound aka drywall mud
- Drywall knife
- Texture sprayer
- Paint and paintbrush (if desired)
How to Texture a Ceiling: Step-By-Step Guide
Step 1: Preparation
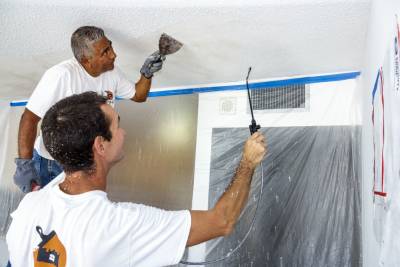
First, be sure to protect your floors, walls, and personal items from any potential dripping. Use drop cloths on the floor and cover the adjacent walls with painters tape.
Step 2: Mix and Apply the Joint Compound
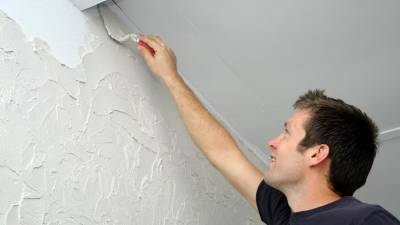
Mix the joint compound with water to create a pancake-batter-like consistency. Use the drywall knife to apply it to your ceiling. Start in the corner and move in straight lines across the room.
Step 3: Texture Application
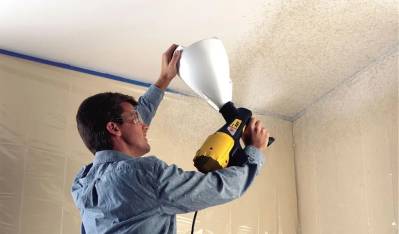
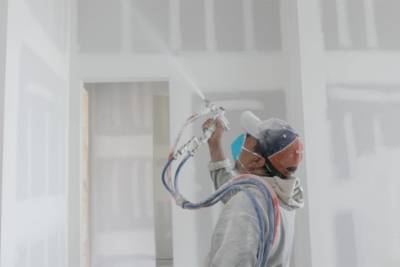
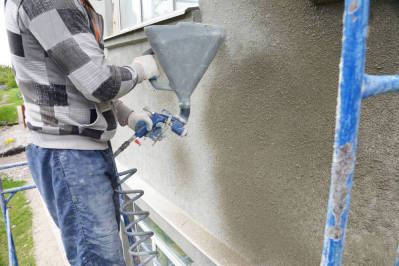
Now comes the tricky part. With a texture sprayer, apply the texture mix to your ceiling. Make sure to follow the manufacturer’s guidance regarding operation and technique.
Step 4: Knockdown (For Knockdown Texture Only)
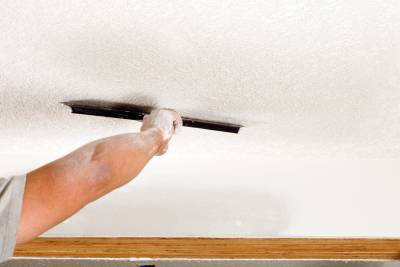
Once you have sprayed the entire ceiling, take your knockdown tool or large drywall knife, and run it lightly over the ceiling to create the desired texture.
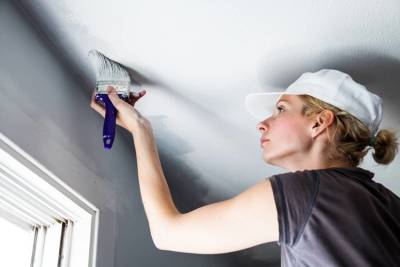
Step 5: Painting
After your ceiling is dry, you can choose to paint it. Ensure you use specially-designed ceiling paint to get the best finish, and let it dry properly before attempting to touch it up.
Texturing a ceiling can be a messy job, so avoid wearing nice clothing and make sure you have ample time to commit to this project. Depending on the size of the room, this could take up a good part of your day.
By considering the factors above and using the steps laid out, you should be prepared to add texture to your ceiling and enhance the look and feel of your home! Remember, patience is key with any home improvement project and look forward to the satisfying end result—your new textured ceiling.
Frequently Asked Questions on How to Texture a Ceiling
What Does it Mean to Texture a Ceiling?
Texturing a ceiling refers to the process of applying a textured compound to the ceiling to create a unique, decorative finish. This technique not only creates a visually appealing effect but also helps to hide imperfections, marks, or repairs on the ceiling surface.
What Materials Do I Need to Texture a Ceiling?
To texture a ceiling, you would need a drywall compound or a pre-mixed texture compound, a paint roller, a trowel or a texture sprayer, a ladder, a paint tray, and protective covers for your floor and furniture. Safety gears like goggles, masks, and gloves are also essential.
What are the Different Types of Ceiling Textures?
There are several types of ceiling textures you can choose from. The most common ones include popcorn, knockdown, stomp, orange peel, and swirl. Each type of texture gives a distinctive look to your ceiling, and the choice largely depends on your personal preference and the overall aesthetic of your space.
How Do I Prepare My Ceiling for Texture?
Before you start texturing, the ceiling should be clean and free of dust, dirt, or grease. Any existing loose paint should be scraped off, and holes or cracks should be filled and sanded down. Apply a coat of primer to help the texture compound adhere better to the surface.
How Do I Apply the Texture?
After preparing the ceiling, you can apply the texture using various techniques. For instance, you can use a brush or roller for a stippled or orange peel effect, a trowel for a knockdown or swirl effect, or a sprayer for a popcorn effect. The application method depends on the texture style you are going for.
How Long Do I Need to Wait for the Texture to Dry?
Typically, a textured ceiling will take about 24 hours to dry completely. However, it's best to wait until the ceiling is fully dry before painting, which could take up to 48 hours. It's crucial not to rush this process to achieve the best results.
Can I Paint Over a Textured Ceiling?
Yes, absolutely. Painting over a textured ceiling can enhance its appearance. It is recommended to use a thick-nap roller or a sprayer for this job to ensure you get into all the crevices of the texture. Remember to use a primer before applying the paint for the best results.
Is DIY Ceiling Texturing a Good Idea?
Yes, texturing a ceiling can be a DIY project, especially if you have the time, patience, and are willing to learn. However, it can be messy and physically demanding, and the finishes may not be as professional as when done by an expert. If you're uncertain, it's best to consult a professional.
Are there Any Safety Precautions I Should Take?
Definitely. As texturing a ceiling can create a dusty environment, always wear safety goggles and a mask. It's also wise to have someone nearby when using the ladder for extra safety. Besides, ensure the room is well-ventilated during and after the process.
What Should I Do If I Mess Up My Ceiling Texture?
If you’re not satisfied with the texture, you have a short window where you can smooth it over with your trowel, and start again. If the texture material is completely dry, you'll have to sand it down before applying a new texture. Remember, practice makes perfect and you can always seek professional help if needed.
Pros and Cons of Texturing a Ceiling
Pros of Texturing a Ceiling
Visual Appeal
One of the most prominent advantages of texturing a ceiling is the aesthetic enhancement it brings. A textured ceiling can add an extra dimension of style and elegance to a room:
- The texture can provide depth and create visual interest in what could otherwise be a plain, flat surface.
- It's an opportunity to introduce a decorative element that complements the style of the room.
Conceals Imperfections
A primary functional benefit of a textured ceiling is the ability to hide flaws:
- Texturing is excellent for covering up imperfections like cracks, seams or uneven surfaces, making ceilings appear flawless.
- This technique can prove particularly useful in older homes where there might be multiple coats of paint or patches of plaster that are difficult to remove.
Sound Absorption
Beyond visual appeal, texturing a ceiling can also provide some level of sound absorption:
- This means that it can help to dampen noises, which can be extremely useful in high-traffic areas or spaces with high ceilings.
- Depending on the type of texture used, it could contribute to reducing echo and improving the sound quality within a room.
Cons of Texturing a Ceiling
Difficulty in Application
Applying a texture to a ceiling can be challenging, particularly for those not familiar with the process:
- It requires some level of skill and experience. If not done correctly, the end result may look uneven or may not achieve the desired effect.
- The process can be messy as droplets of the texture can fall on the floor or furniture.
Difficulty in Cleaning and Maintenance
Cleaning and maintaining a textured ceiling can be quite a task:
- Dust and spider webs often settle into crevices within the texture. Cleaning these surfaces thoroughly requires more effort than cleaning a flat surface.
- In the event of a water leak or any stains, it can be challenging to clean the affected area or match the texture if repairs are necessary.
Outdated Look
While the visual appeal of a textured ceiling is subjective, it's worth noting that some people view certain textures as outdated:
- Styles like popcorn or cottage cheese texture can seem old-fashioned and may not appeal to people preferring a more modern aesthetic.
- This can be a factor to consider if you're considering selling your home. A textured ceiling can potentially be a deterrent to prospective buyers who dislike the style.
The decision to texture a ceiling can significantly depend on individual preferences, the style of the room, and the level of maintenance willingness. Considering these pros and cons can assist in making an informed decision.
Summary
So, you've learned all the tips and tricks on how to texture a ceiling. Whether you're redesigning your room or giving your office a fresh look, having these skills can add value and aesthetic appeal to your space. Just remember to use the appropriate tools, prepare your surfaces well, and master the various techniques. Practice makes perfect, and with time, creating stunning ceiling textures won't feel like a chore.
Adding a texture to your ceiling doesn't have to be a task for professionals. Now that you know how to texture a ceiling, you can do it yourself. The process allows for creativity and personal input, meaning you can always throw in your unique touch. And above all, always remember to protect your eyes and skin, and most importantly, your precious floor from the potentially messy endeavor.
Don't hesitate to revamp your ceiling and add a little extra charm to your place. Understanding how to texture a ceiling broadens your DIY horizons. But remember, while the task can be fun and rewarding, patience is also a crucial ingredient. Every stroke and texture applied needs time and care, to ensure you get the most out of this exciting home improvement adventure. Happy texturing!
About Atlas Stucco
Welcome to Atlas Stucco, your trusted stucco specialist in Sacramento, CA. With years of dedicated service under our belts, we've built a reputation for delivering top-notch quality and exceptional craftsmanship. Whether you're aiming for a smooth contemporary finish or a classic rough texture, our team of seasoned professionals is committed to transforming your vision into reality. We believe in creating long-lasting, beautiful surfaces that enhance the beauty and value of your property.
Tags: ceiling texture, DIY, home improvement,


